You can find all the materials used and the tutorial with step by step instructions in the Cuddly Buddly blog, where more porjects of the team are available
Handmade crafts, scrapbooking, vintage items, shadow boxes, paper crafts, cards, mixed media items, tutorials and step by step instructions for projects.
Wednesday, 21 January 2015
His and hers Valentine's cards and key rings
You can find all the materials used and the tutorial with step by step instructions in the Cuddly Buddly blog, where more porjects of the team are available
Saturday, 20 December 2014
Angel greeting card
Friday, 31 October 2014
Christmas cards
Tuesday, 28 October 2014
Greeting card - baby boy
Thursday, 21 August 2014
Squinty Standing Card & Tag Tutorial
Sunday, 3 August 2014
Greeting card - Mixed, Boy and girl
Saturday, 10 May 2014
Birdcage window card
Friday, 14 March 2014
Heart shaped greeting card
A heart shaped card with feathers for your special message to your beloved one! It can be later used to add a photo inside.
It can be hanged by the side chain and decorate a corner of your place.
Here is what you will need to make it!
Materials used
- chipboard
- Kim's Digi Templates - Heart Shaped Card
- white colour cardstock
- floral embossing folder
- Tim Holtz Distress Ink Pad - Frayed Burlap
- Versamark clear ink
- embossing powder - copper
- 3mm brown satin ribbon
- flowers
- Marianne Design Creatables Die - Branch & Flowers 1
- cArt-Us Nested Dies - 5 Petal Flower
- pearls
- pins to use with pearls
- copper chain
- feathers light brown and white
- metallic corners
- heart shape mould
- casting powder
- copper wire
- white pearl, brown and black paints
- Viva decor stamp
- Barbara Anne Williams Digi Stamps - Sentiments One
- eyelets (copper colour)
- die cutting and embossing machine
- scissors and art knife
- hot-air gun
- paper glue
- hot glue
- pencil
First of download and print the Heart shaped card template from Cuddly Buddly.
Do the same with Barbara Anne Williams Digi Stamps - Sentiments One
From the Heart shaped card you will need template 2 (the big heart) x 4 times on your cardstock. Print one more to use as guide when cutting the chipboard.
Before proceeding further, use the heart shape mould and the casting powder to make one heart. Let it dry to be used later.
Cut 2 heart shapes from chipboard. These will be your bases!
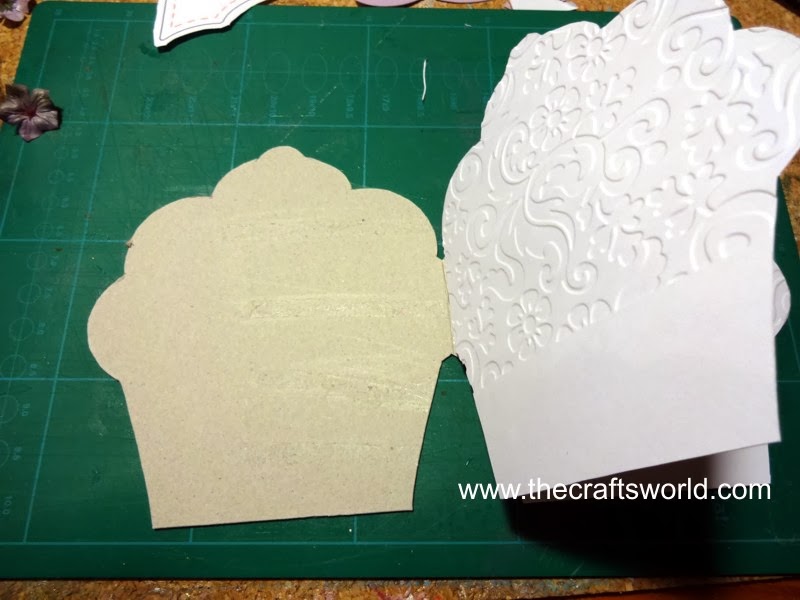
Using the floral embossing folder emboss one only paper heart.
Have brown shades on all paper hearts as shown.
Now, glue the 3 paper hearts on the both sides of chipboard hearts leaving aside the embossed paper heart.
Take the chipboard heart with the one only finished side and with a pencil draw short lines (about 5mm) close to the edge.
This is your piercing guide to cut with the art knife. This side will be the front of the card.
When done, take the brown ribbon and sew it as in the photo.
Remember to secure with some glue at the end.
Now glue the embossed paper heart.
Emboss the letter stamp using versamark ink and copper embossing powder
With your die cutting machine cut 2 flowers with Marianne Design Creatables Die - Branch & Flowers 1 (large flower) and add brown shadows with the Tim Holtz Distress Ink Pad - Frayed Burlap.
From Barbara Anne Williams Digi Stamps - Sentiments One use the “with a thankful heart” sentiment and add some brown shadows too. Cut using the flower die and wit the art knife shape a heart.
Mix some white pearl paint with just a little bit brow paint. Paint the heart.
Place one metallic corner at the bottom of the second chipboard heart.
Use some ribbon but glue it only at the edges so it can hold a greeting card or photograph.
Open one hole at top left side of the chipboard hearts and set a copper eyelet. This is where the chain will go throw to hold the two parts.
Start embellishing the front of the card. First place 3 white feathers at the right side. Then the brown ones. If you find them too long, shorten them a bit to fit better. Take some copper wire and turn to form spirals. Have the pearls on the pins and curve them a bit to unable to stay up when hot glued. Glue your the pearled paint heart, the paper and the satin flower.
Take a white feather, use some black paint at the peak of it ( as been dipped in ink!) and few drops on the “the thankful heart” sentiment heart and glue on it.
Then place it to the left inside of the card.
Saturday, 15 February 2014
Greeting card - Bird cages
[gallery ids="271,269,270"]
Sunday, 26 January 2014
Cupcake card
A very special card in a very sweet shape to send your wishes is a Cupcake card!
The template can be found in Cuddly Buddly website and is free!
You can directly print the template on the papers that you will use for the base and the topping. However, as I usually like to make cards that can be kept for long time and in some cases used later to place a photo, you will need to print a spare copy to use when you cut the chipboard, which I have as base to built my card on.
The materials and tools you will need to make this card are:
- chipboard
- 20mm spun cotton balls (you could use various sizes if you like)
- white and purple cardstock A4 size (or choose your colour, pattern etc)
- purple colour aluminium wire
- floral embossing folder
- cart-us nested dies - bracket frames 2
- flowers for decoration
- white and fuchsia ribbons
- embossing powder in two colours cranberry and purple
- UTEE clear powder to use with the Melting pot
- acrylic violet paint
- 3mm rhinestones
- Tim Holtz Distress Ink Pad - Frayed Burlap
- puple and silver inkpads
- scissors and art knife
- paper glue
- hot glue

Print a copy to use as pattern and another one on white cardstock sheet for the inside part.
Then print template 2 found in file.
Print the topping part on a white sheet and the lower part on the purple sheet. You will need 2 copies of template 2 (big cupcake). At this point you can enlarge just a little bit the template. This will help cover the chipboard better.
Take an A4 size piece of chipobard and cut along using the printed pattern. I used some repositionable glue to keep the pattern in place.

Your chipoboard base now is ready for decoration!
Take 2 cotton balls and cut them in half and pain them with the acrylic violet paint. Let them aside to dry.
Cut the rest pieces from the cardstocks. Here you can see the different size of the chipboard and the cardstock piece.
Using the floral embossing folder, emboss the inside piece as images shows.
Then emboss the lower parts of the cupcake.
Use the silver inkpad to make shades on embossed design.
Glue the inside piece on the chipboard base.
Have brown shades on cupcake topping pieces....
....and on the embossed inside paper.
Use purple inkpad for the lower part.

Glue the rest of the pieces to the outside of the chipboard. First the cupcake base then the topping.
Melt some UTEE clear powder and add a little of cranberry and purple embossing powders.
When UTEE powder is ready, pure drops on the front cupcake topping and close to the points where you will place the half cut cotton balls.
Using a nested die cut a white label to place it outside the card. Use ink pad for some shades and write a wish or anything you like!
Cut and bend the wires.
Make a bow of the fuchsia ribbon.
Using hot glue place the cotton balls, the ribbons, the wires and at the end the bow and the flowers to cover the ends of wires.
Add rhinestones to look like sprinkles.
Ribbons inside the card are only glued at the rear ends. This will allow you to place a gift card, a photo or whatever you want!
Monday, 6 January 2014
Birthday Card
[gallery ids="98,99,100"]
Wednesday, 25 December 2013
Christmas card
Monday, 28 October 2013
Wedding card
[gallery ids="164,165"]